How to generate random points in QGIS and export as GPX file
Last update: 02/11/2019
Some time field survey require random field locations to remove bias from the data collection. QGIS can generate random points for a field survey
Area of Interest for generating random points.
There are three ways to define area of interest in QGIS and these are
- Use canvas extent as area of interest
- Use an existing polygon shape file or create a new shape file
- Use layer bounding box as area of interest
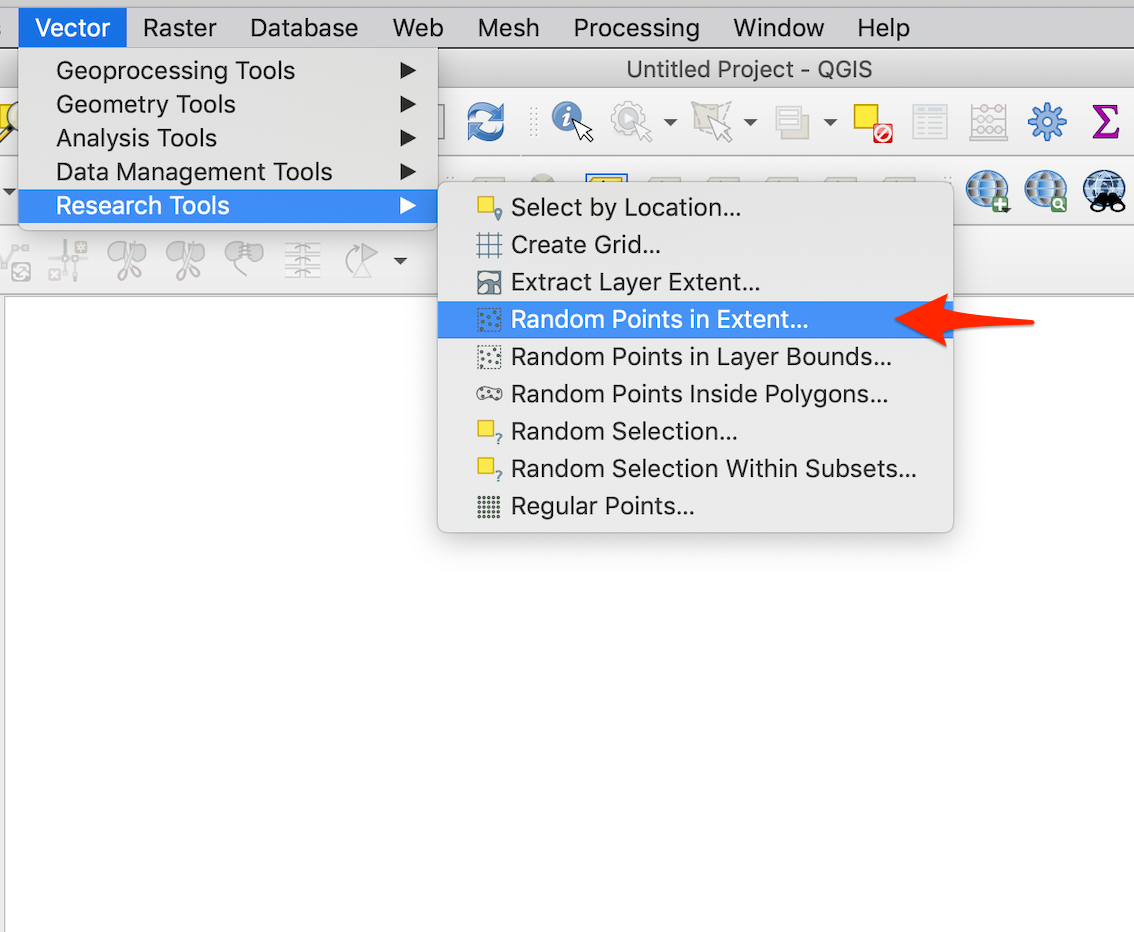
For this blog, I will use the second approach. Go to the QGIS vector menu, click Research tool and finally click Random Points in Extent , as shown in the image below.
A new window will appear with title Random Points in Extent, as shown in the image below.
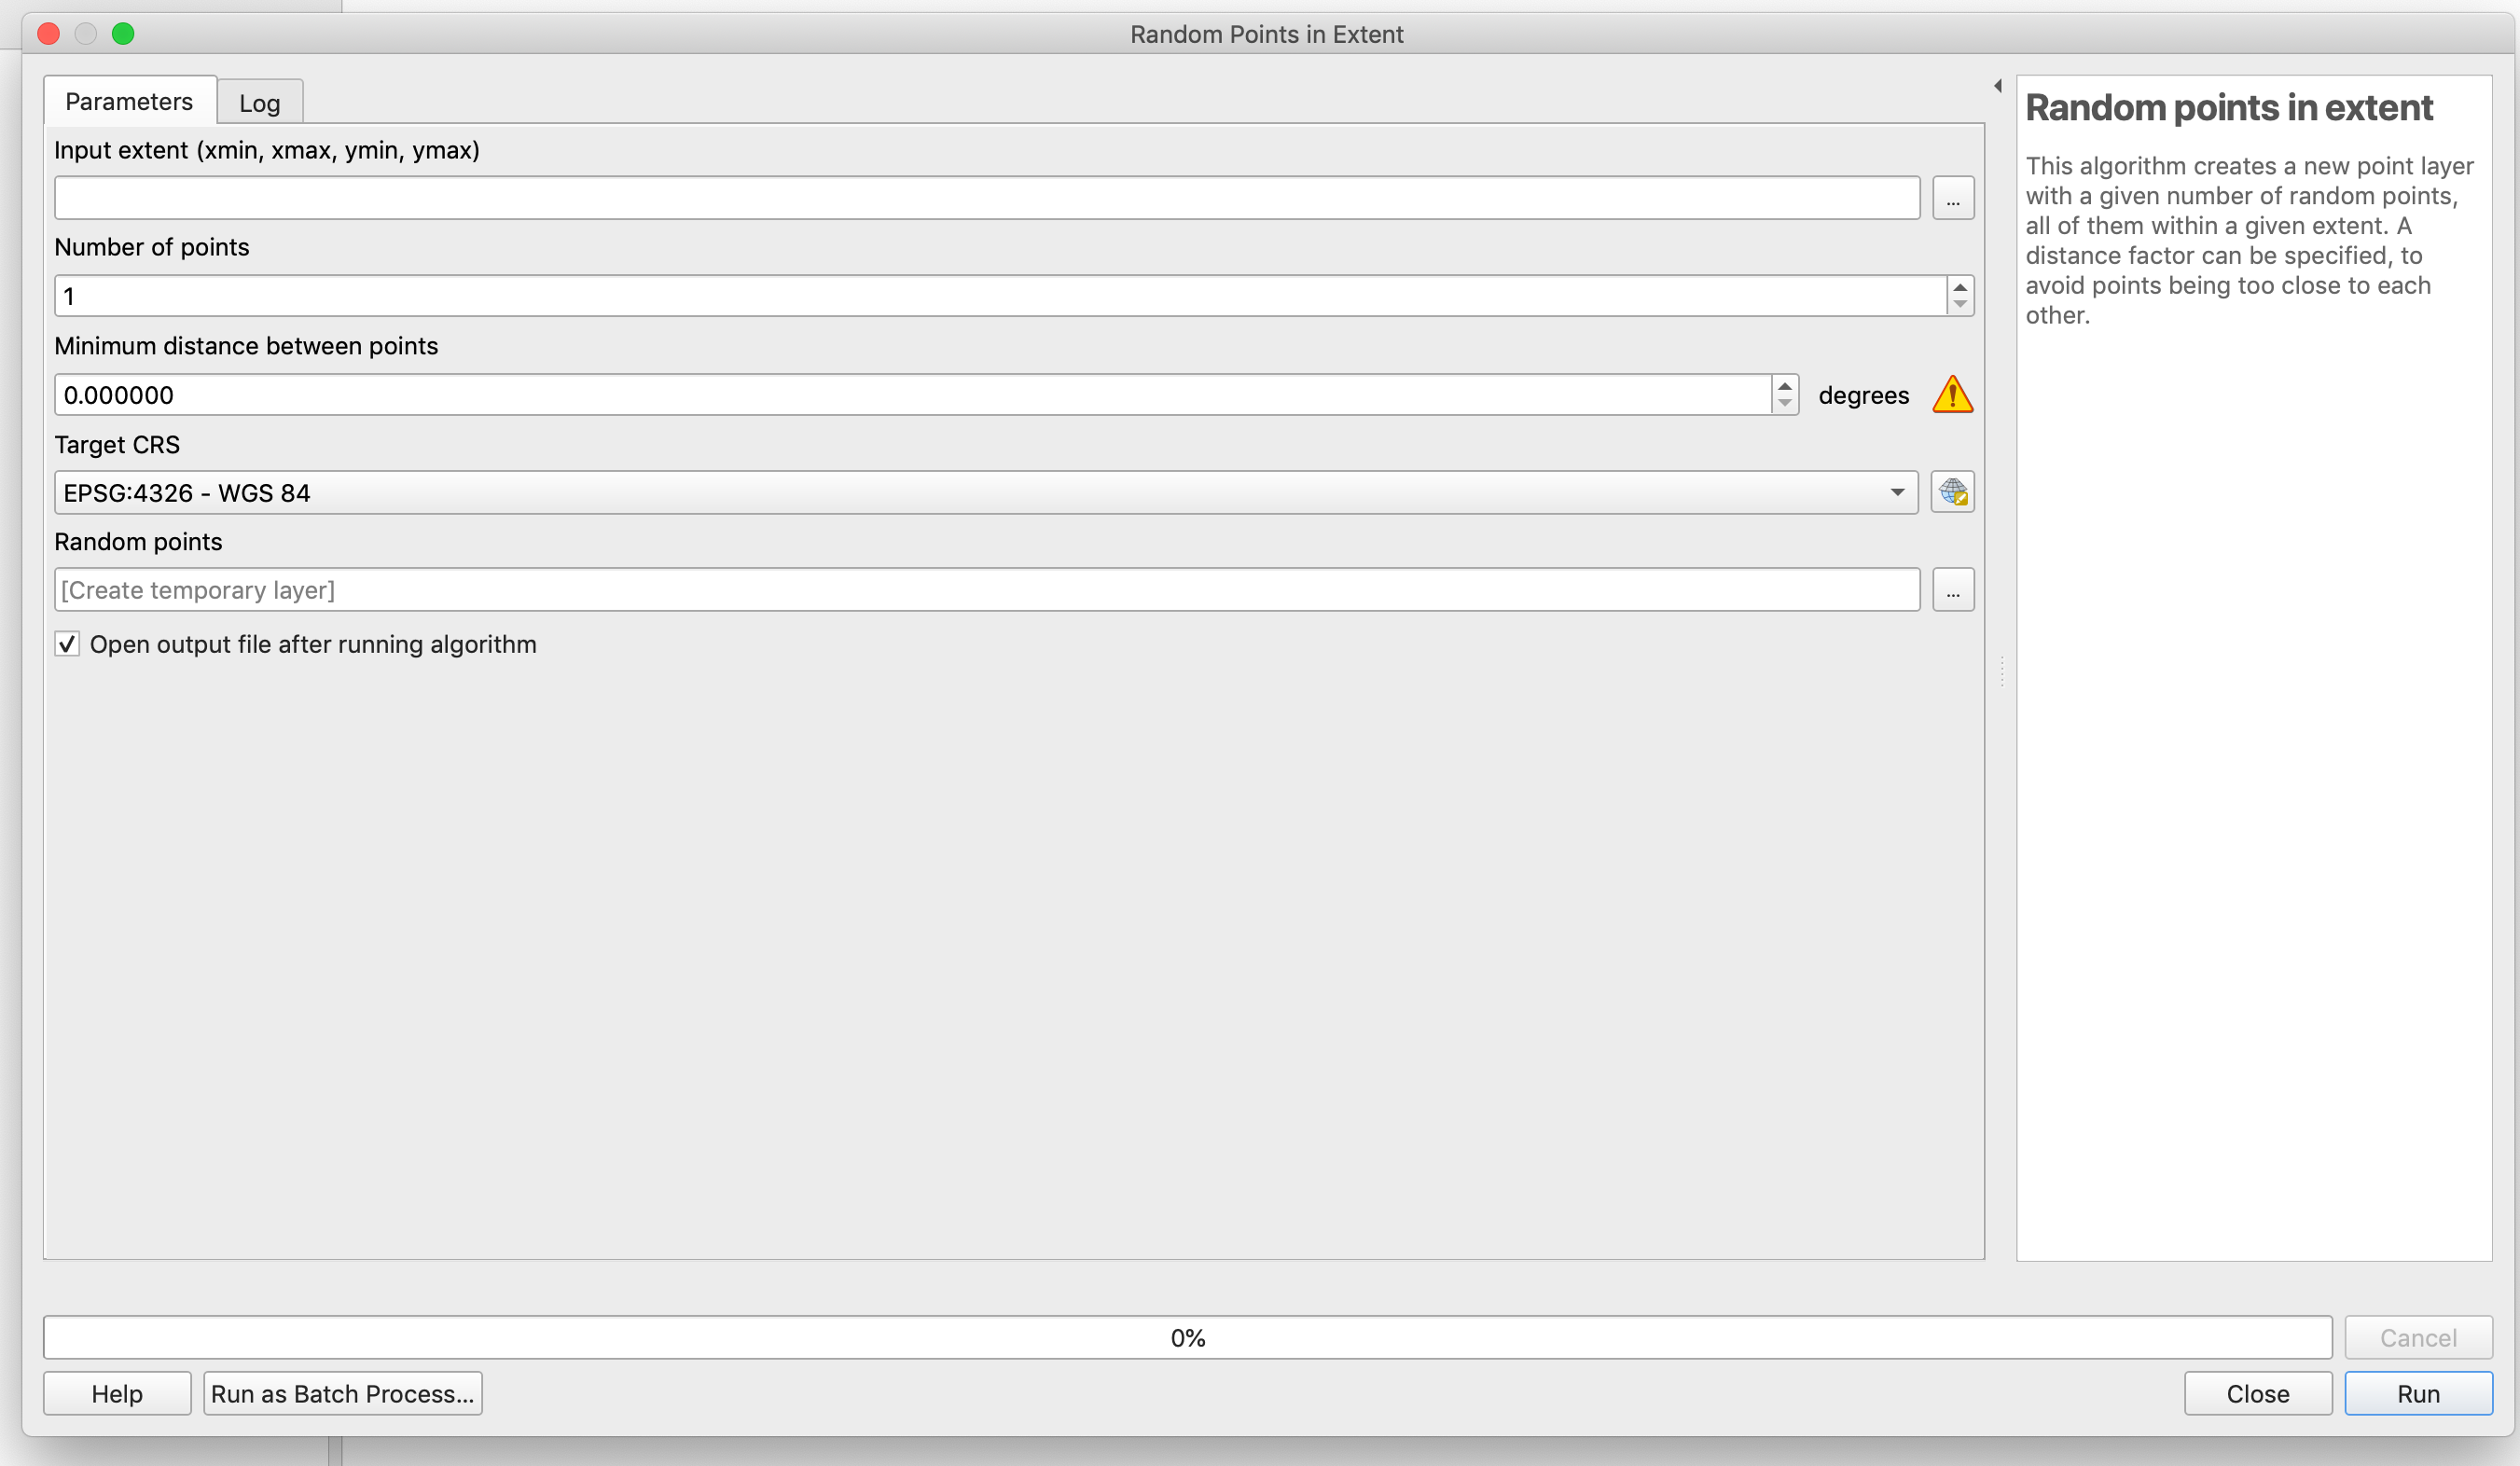
Select the input extent button ![]() next to extent text box and use the option Canvas as Extent. Next, select the number of points you want to generate, I will generate 10 points.
next to extent text box and use the option Canvas as Extent. Next, select the number of points you want to generate, I will generate 10 points.
For the option Minimum distance between points, if you project is not in projected coordinates you will see degrees as unit. For this blog, I will not change to a projected coordinate system but you should.
For option Target CRS, select a Coordinate Reference System (CRS) that you require. I will stick with the default option of EPSG:4326.
Finally, provide a name and path for your random points shape file and press Run button. I got the following output.

Now, lets look at the attritue table of newly created shape file (shown below).
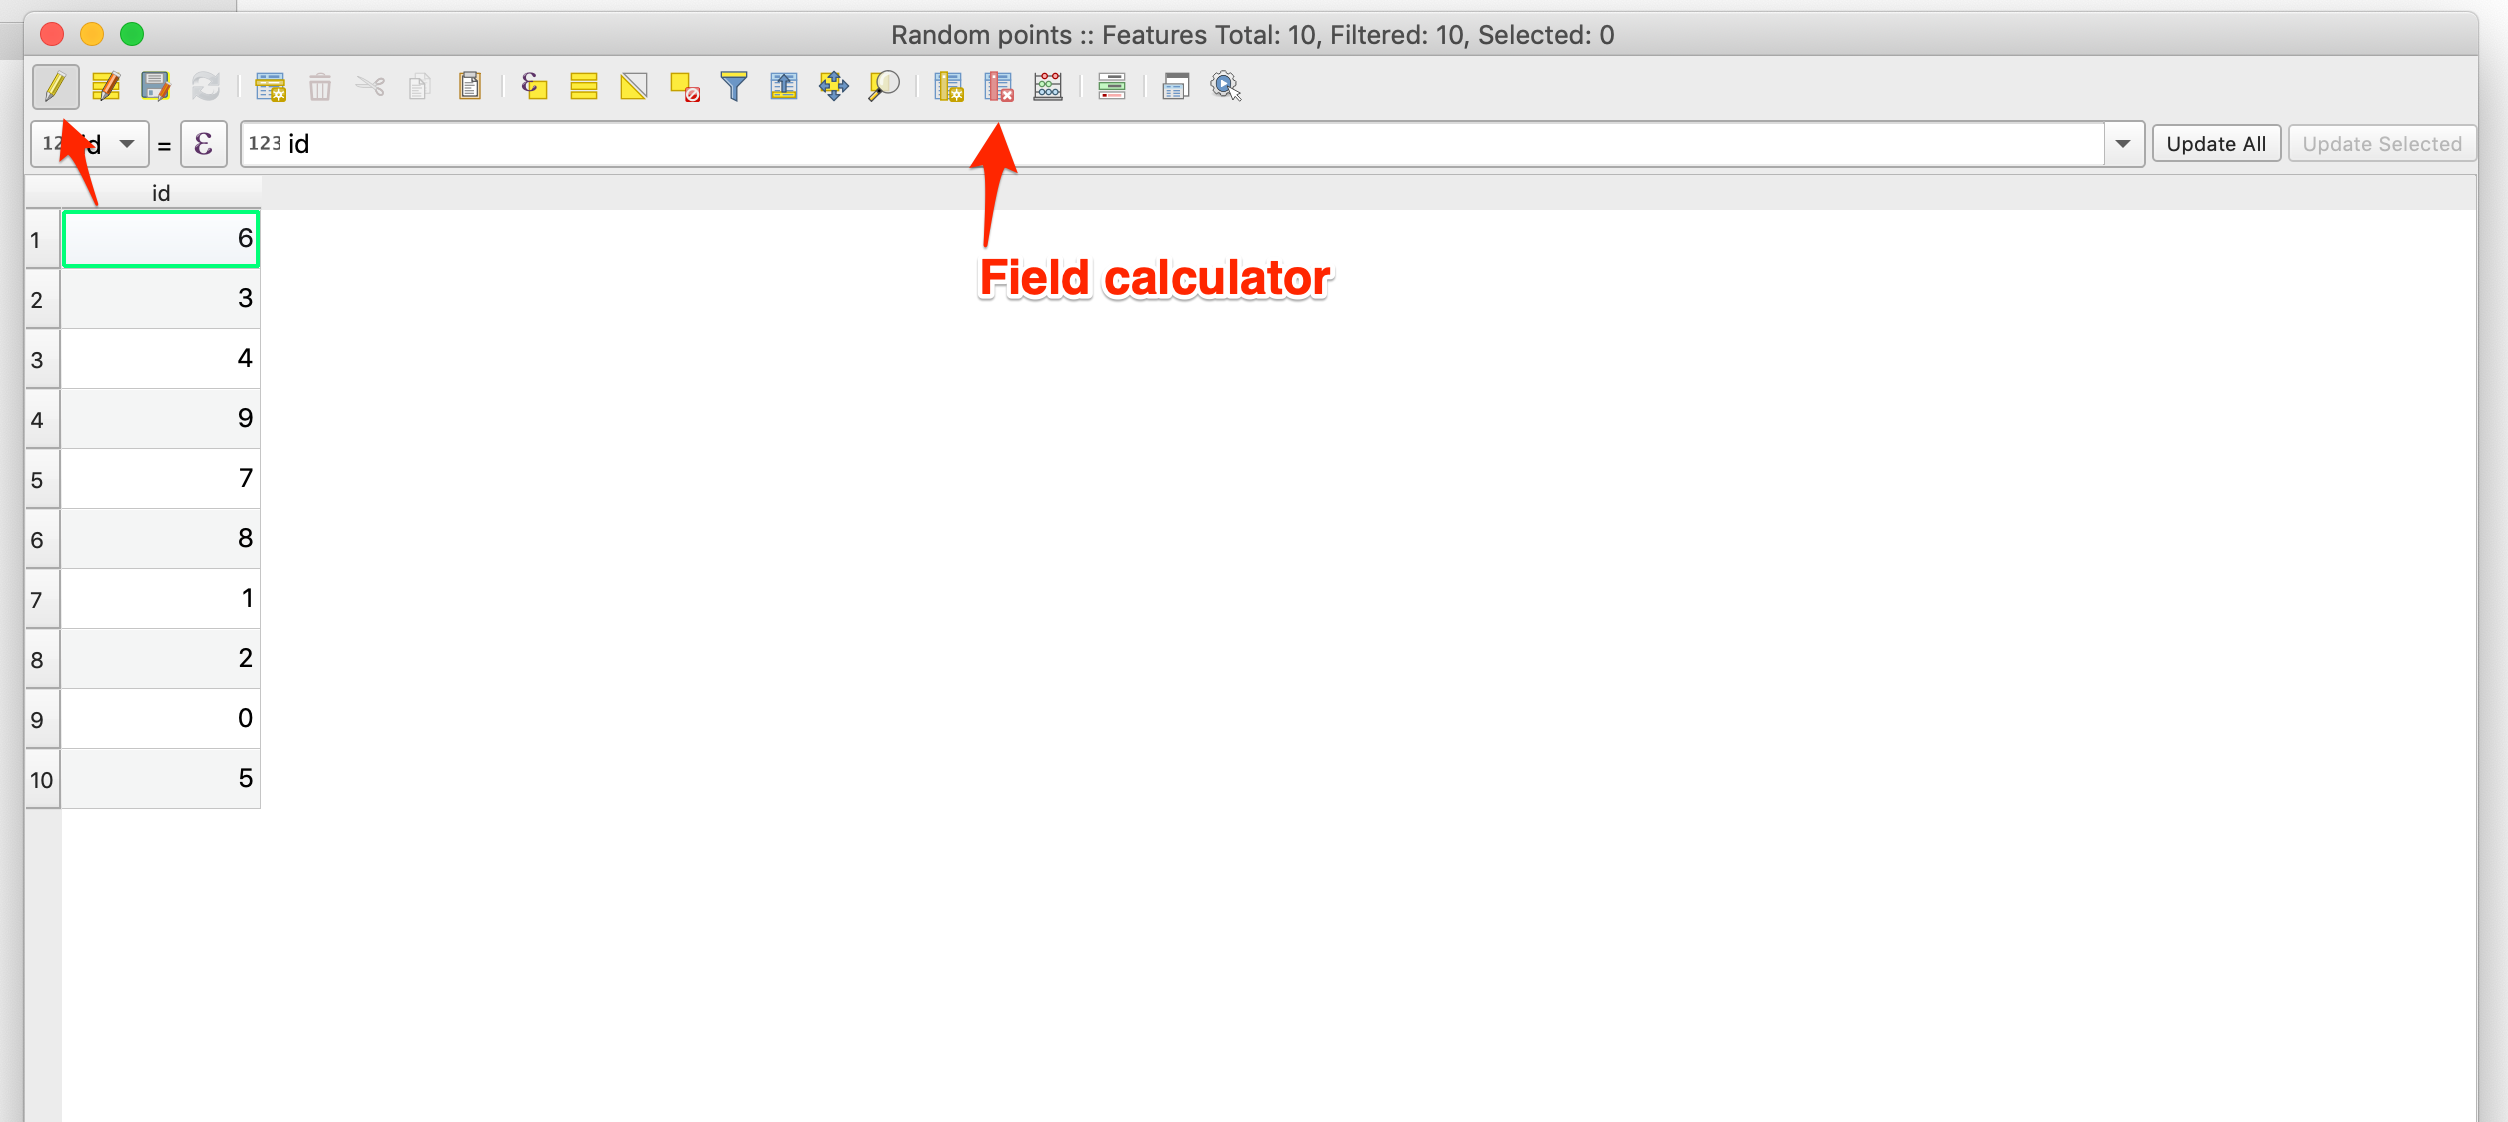
There is only one field id, we want to show point name on our GPS device (or in an app using cell phone). In order to show name of random point, we have to add a filed called name in the attribute table (and you cannot use capital letters in field name). To add a new field, first switch this shape file to Edit mode by pressing the edit button (pointed by red arrow in the image above). Second, press the Field Calculator button to add a new field. You should be able to see a windown as shown below.
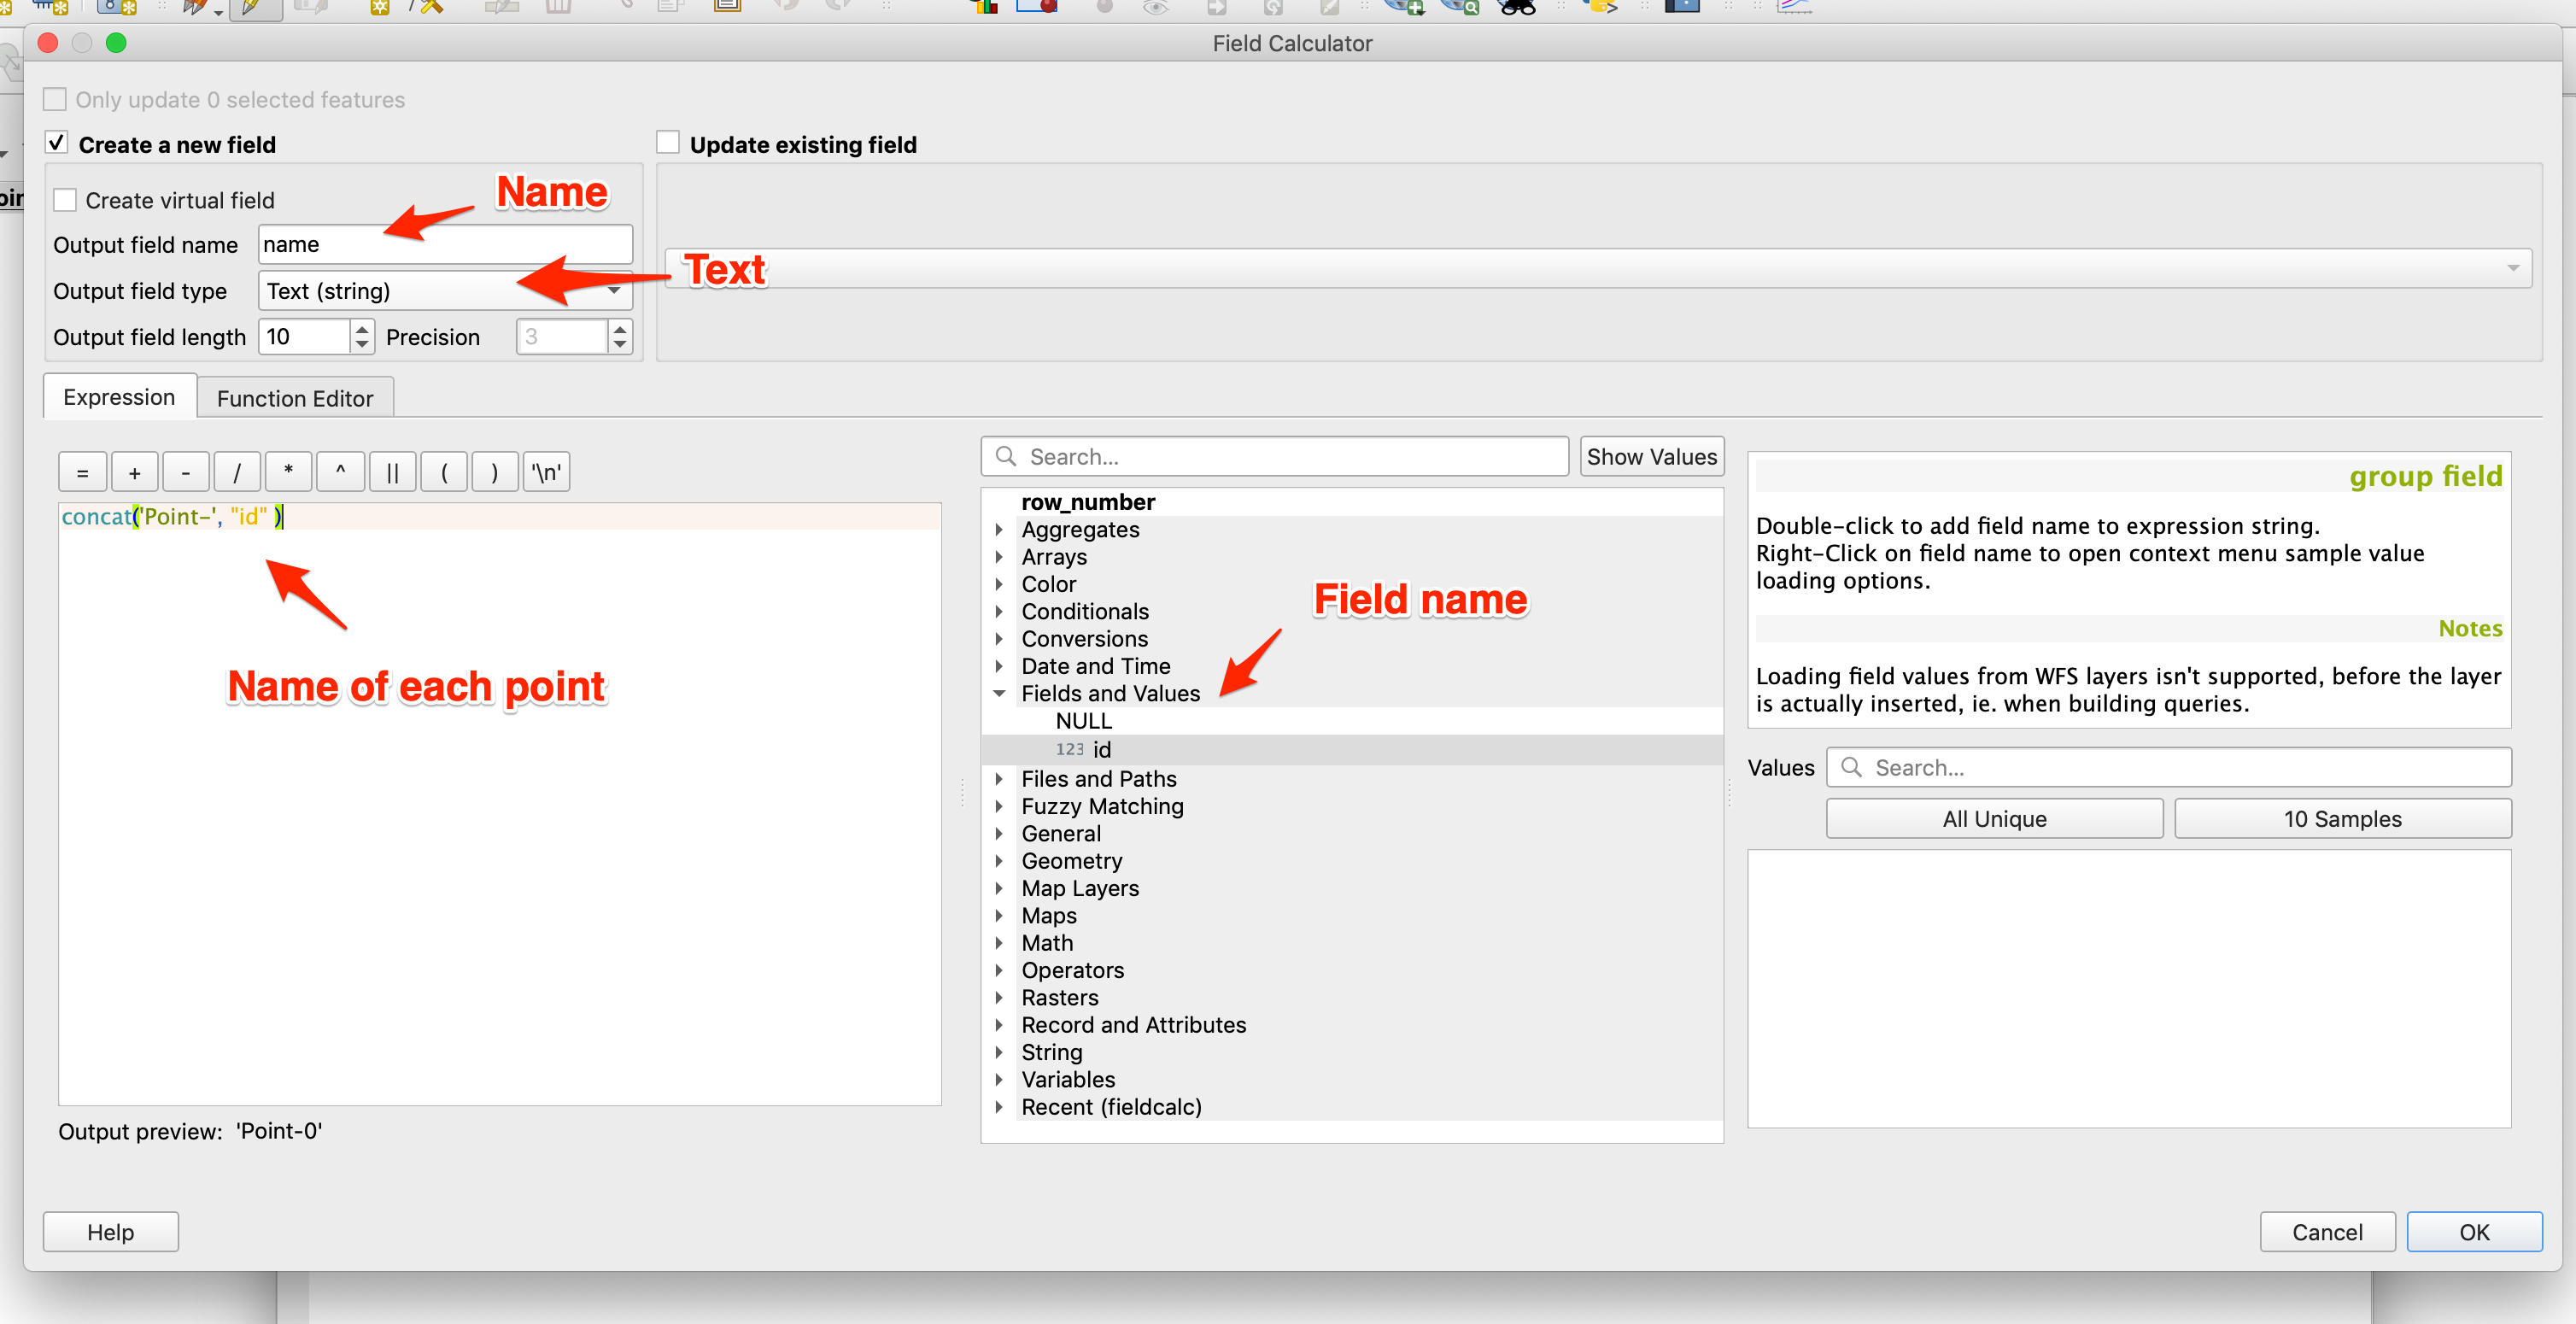
Add field name as name, select text as type. Here I want to use the concat function to concatenate string and point id (it looks better), thus, I used the function concat and used id filed (point by “Field name” red arrow). The Expression is similar to the one shown in the code section below.
concat('Point-','id')
Press ok and you should be able to see new field name in the attribute table (as shown below).
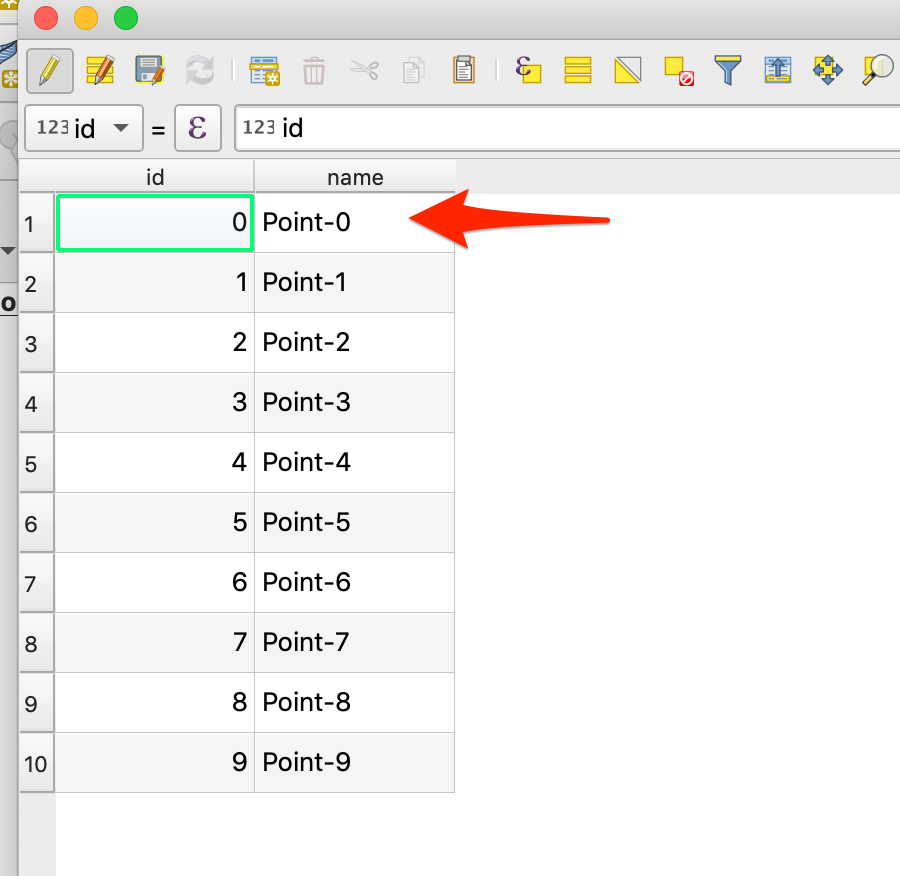
Finally, as your shape file is still in Edit mode, delete the id field.
Don’t forget to switch off the Edit mode of your shape file.
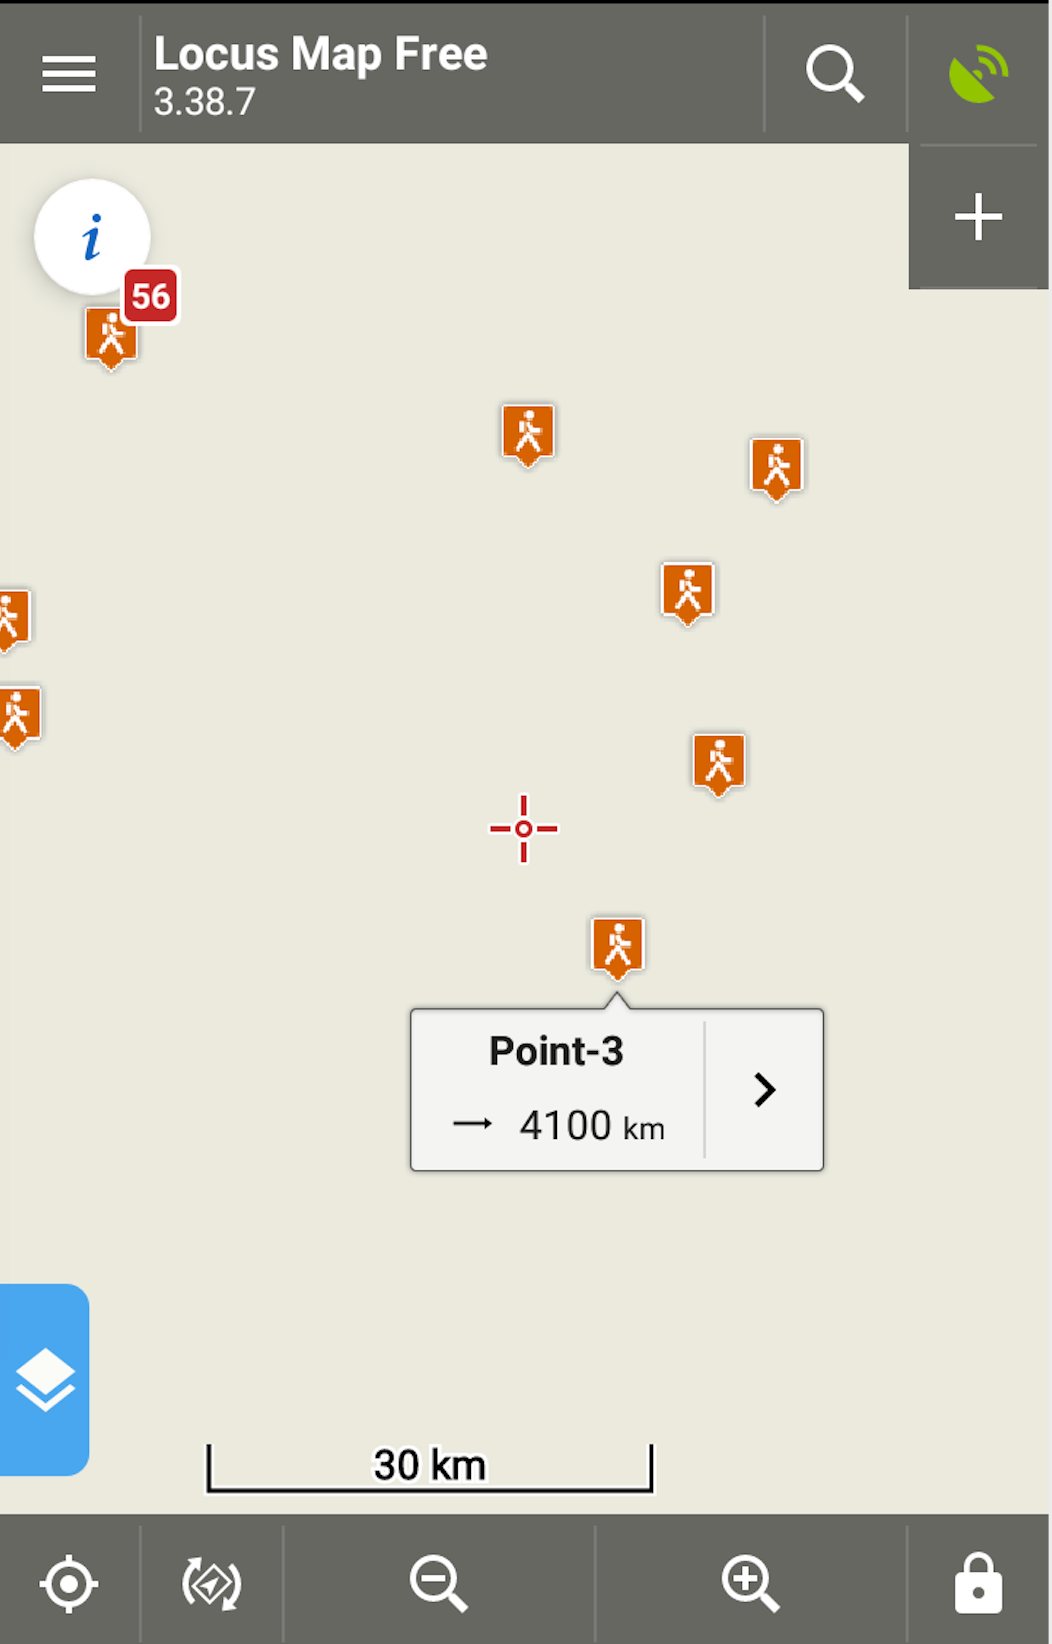
Now finally, export this shape file (in my case temporary layer) as GPX file. Now, when I loaded my GPX file in an android navigation app (LocusMap Free), not only I could see points but their names as well (as shown below).
In an other blog, I will also show the process of loading GPX file to an android phone using a navigation app.
Icon references:
Twiter Icon #268986